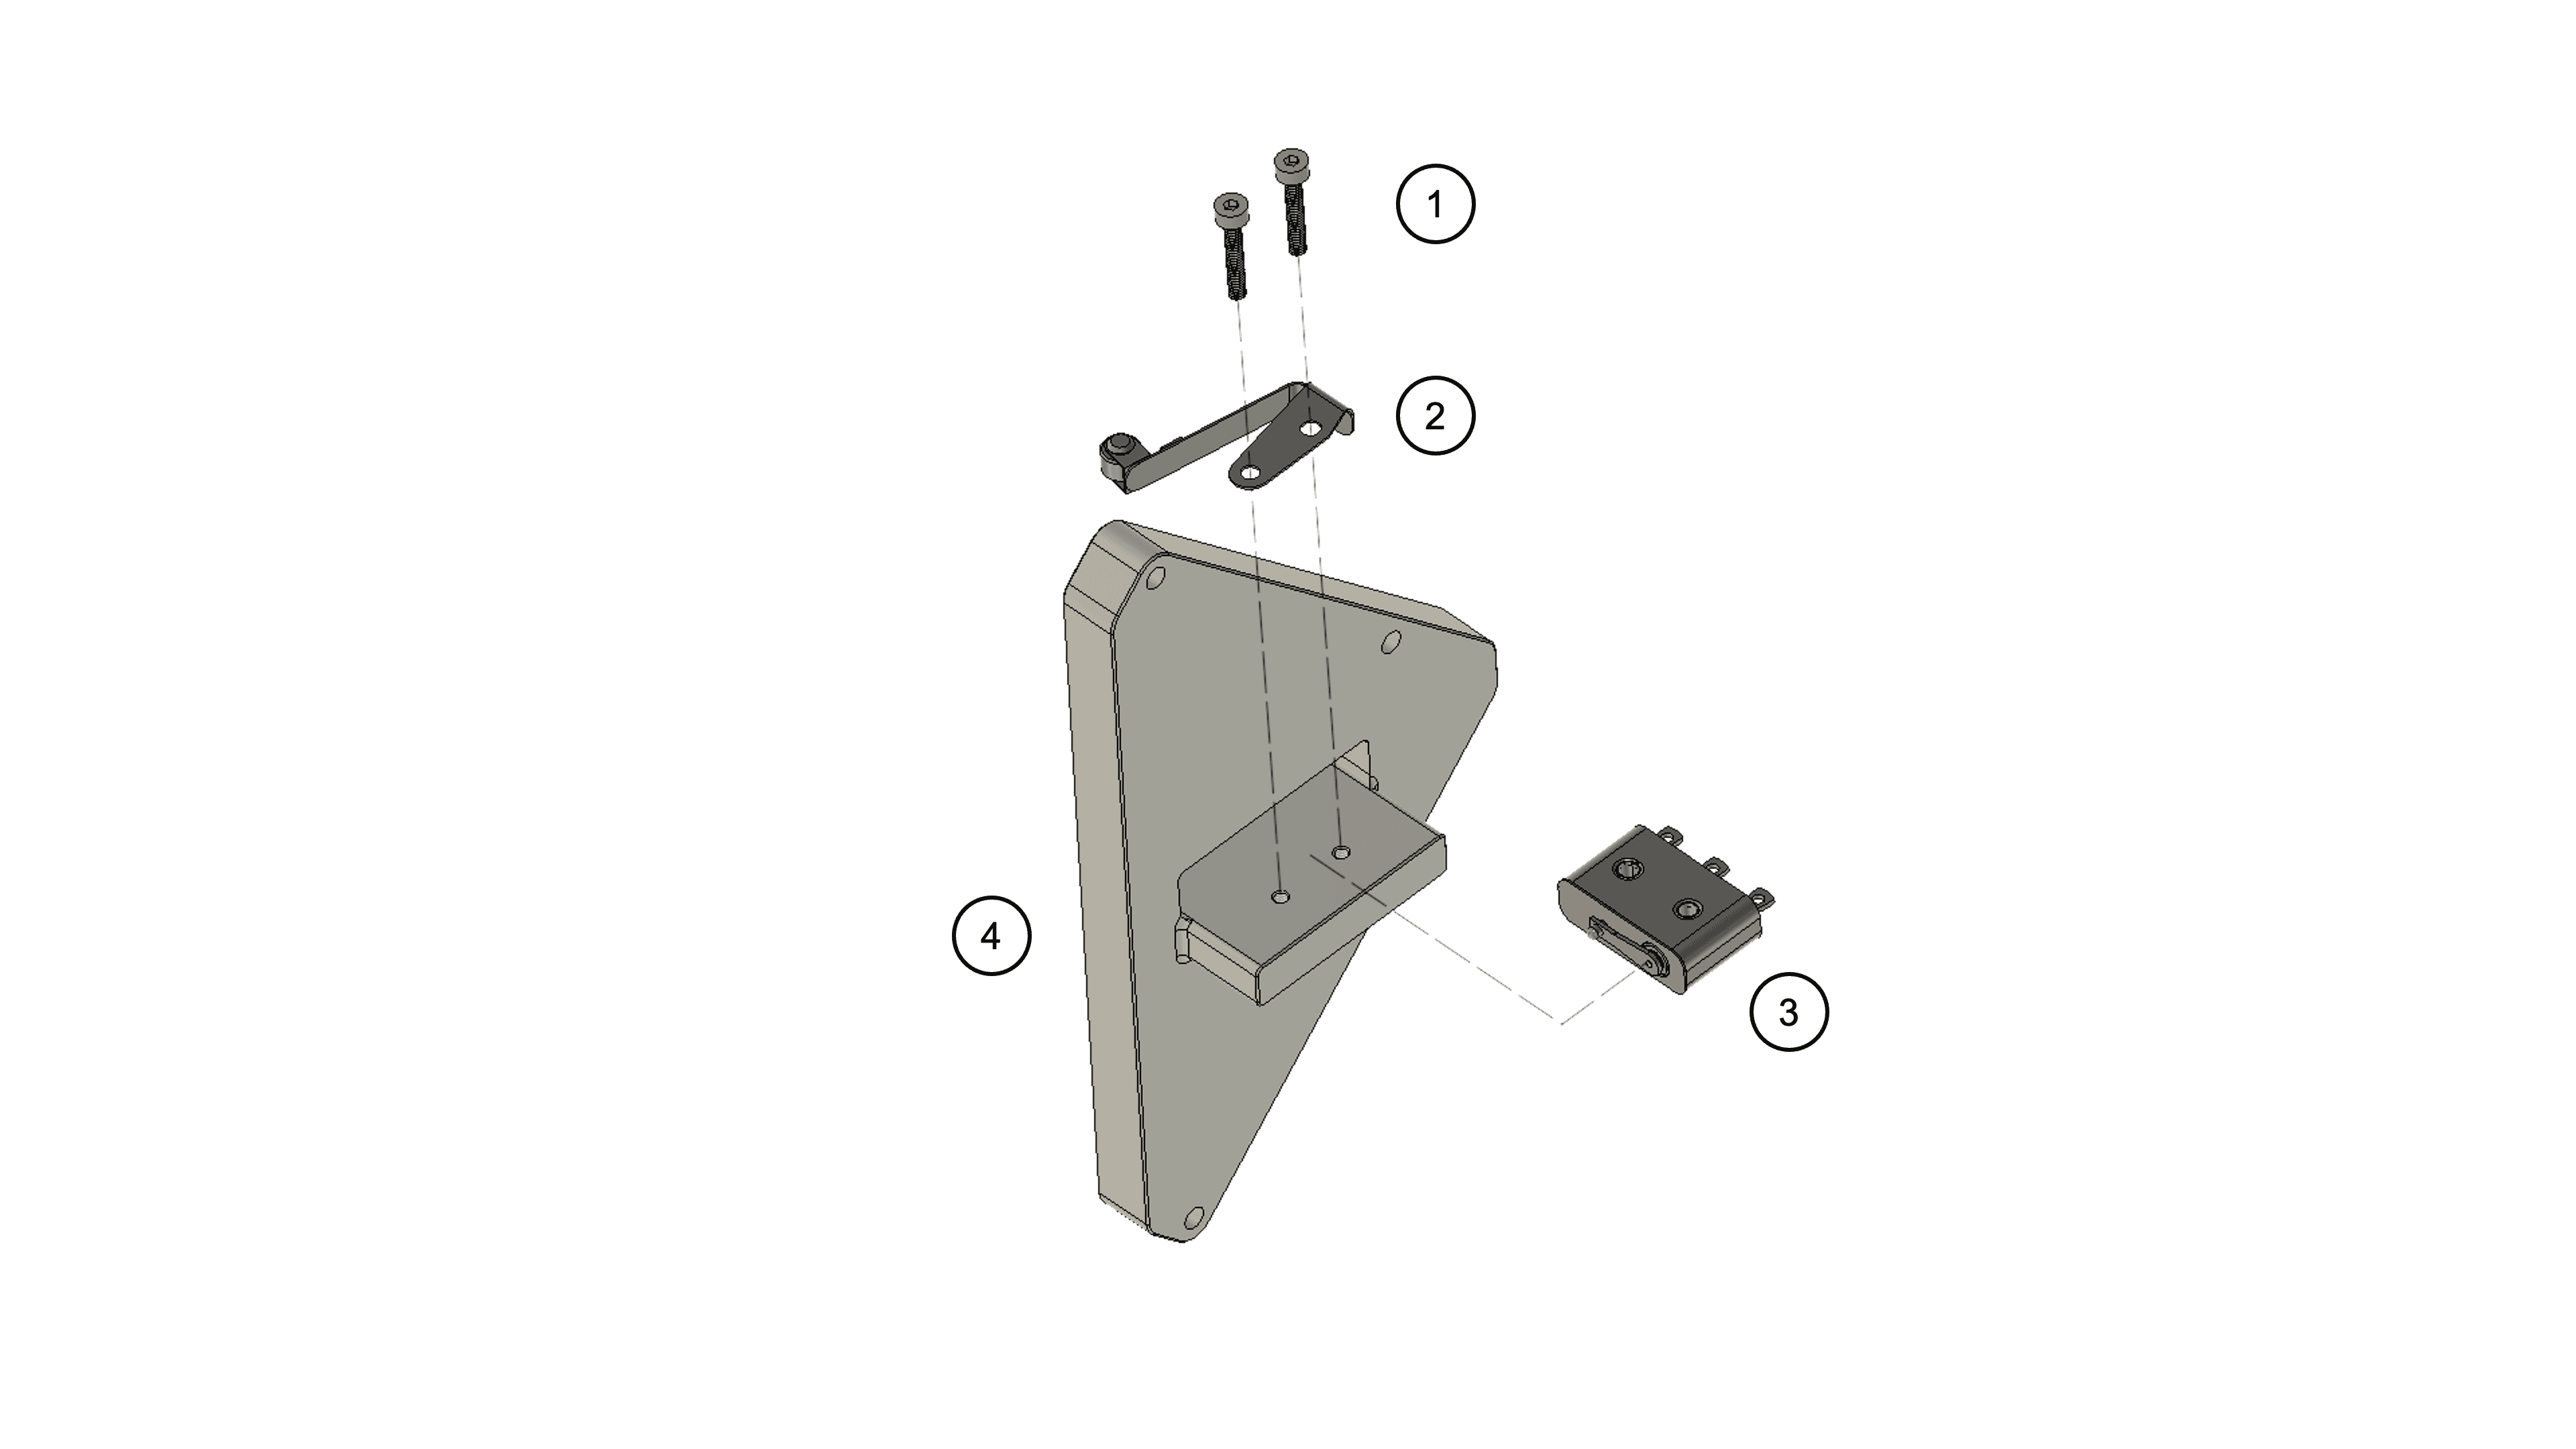
Switches Assembly
| # | Part number | Qty | Assembly Torque [N.m] |
|---|---|---|---|
| 1 | F-CH-M-2-12-A4 | 2 | 0.15 |
| 2 | JS-151 | 1 | - |
| 3 | 11HM1 | 1 | - |
| 4 | S-PUSH-PL-10 | 1 | - |
Step description
Warning
The pre-cut flexible insulator sheet that goes between the lever and microswitch is not visible on the CAD. However, it is required. Don't forget to add it.
-
Attach the microswitch (
#3) with its lever (#2) to the pusher plate (#4) using the M2 x 12 mm fasteners provided (#1). Insert the pre-cut flexible insulator sheet between the lever and microswitch. -
Repeat this step to produce 2x Switch/Deployment Plate assemblies.
-
Please refer to the 11HM1 datasheet for switch pinout information.